
Instagram stories have become a popular way to share moments and express creativity. One of the most exciting features of Instagram stories is the ability to use filters. Filters can enhance the appearance of your photos and videos, adding a touch of fun and creativity to your stories. In this article, we will guide you on how to search for filters on Instagram story in 2023.
Step 1: Open the Instagram App
To begin searching for filters on Instagram story, open the Instagram app on your mobile device. Make sure you are logged into your account and have access to the internet. Once the app is open, tap on the camera icon located at the top left corner of your screen to access the story feature.
Step 2: Swipe Right or Tap the Camera Button
After accessing the story feature, you can either swipe right on the screen or tap the camera button at the bottom center to open the camera. This will allow you to take a photo or record a video that you can later enhance with filters.
Step 3: Access the Filters
Once you have taken a photo or recorded a video, you can access the filters by swiping left or right on the screen. This will cycle through the available filters, allowing you to preview how each one will look on your photo or video. Take your time to explore the different options and find the perfect filter for your story.
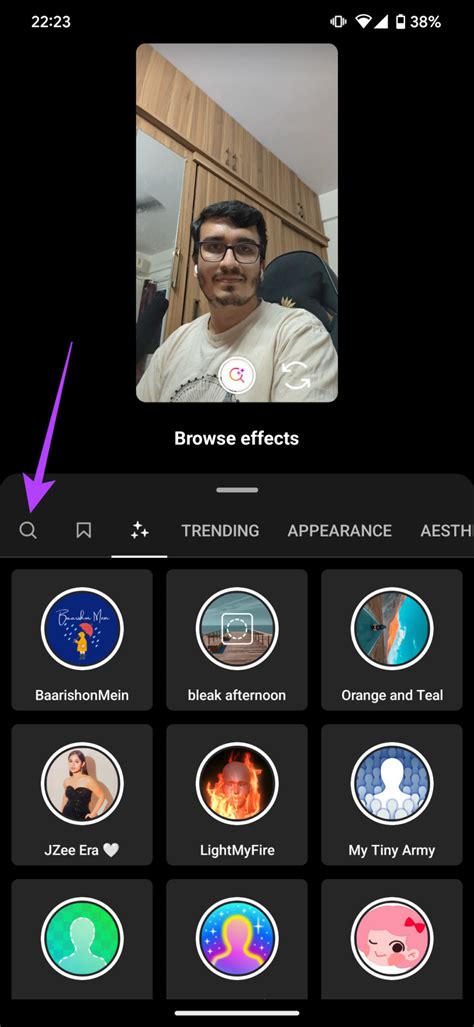
Step 4: Use the Search Bar
If you have a specific filter in mind or want to discover new ones, you can use the search bar at the bottom of the screen. Tap on the search bar and type in keywords related to the filter you are looking for. For example, if you want to find a filter that adds sparkles to your photos, you can type in “sparkle” or “glitter.”
Step 5: Browse Through the Results
After entering your search keywords, Instagram will display a list of filters that match your search. Browse through the results by swiping up or down on the screen. Each filter will have a preview image and a name, making it easier for you to choose the one that suits your story best.
Step 6: Save and Apply the Filter
Once you have found a filter you like, tap on it to apply it to your photo or video. You can also tap on the save button located at the bottom right corner of the screen to add the filter to your favorites. This will make it easier for you to access the filter in the future without having to search for it again.
Step 7: Share Your Story
After applying the filter, you can further customize your story by adding stickers, text, or drawings. Once you are satisfied with your creation, tap on the “Your Story” button at the bottom left corner of the screen to share it with your followers. You can also choose to send it to specific individuals or post it as a close friends story.
Frequently Asked Questions
-
Can I create my own filters on Instagram story?
No, currently Instagram does not allow users to create their own filters for Instagram stories. However, you can use the available filters to enhance your photos and videos.
-
Are filters available for both photos and videos?
Yes, filters can be applied to both photos and videos on Instagram stories. Simply follow the steps mentioned above to access and apply filters to your desired media.
-
How often are new filters added to Instagram?
Instagram regularly adds new filters to keep the platform fresh and exciting. New filters are typically added on a monthly basis, offering users a variety of options to choose from.
-
Can I use filters from other users?
Yes, you can use filters created by other users on Instagram. When browsing through the available filters, you may come across filters created by other users. Simply tap on the filter to try it out and add it to your favorites if you like it.
-
Do filters affect the quality of my photos and videos?
Filters can enhance the appearance of your photos and videos, but they may also alter the original quality. It’s always a good idea to preview the filter before applying it to ensure it enhances your media in the desired way.
